在 Vue 2 项目中使用 Element UI
本实验手册将指导你如何在 Vue 2 项目中使用 Element UI 组件库,搭建一个简单的页面。
一、介绍 Element UI
Element UI (Element - 网站快速成型工具)是一套基于 Vue 2.0 的桌面端组件库,提供了丰富的、可复用的 UI 组件,可以帮助开发者快速构建美观、易用的 Web 界面。它具有以下特点:
- 丰富的组件: 提供了各种常用的组件,例如按钮、表单、表格、布局等,满足各种开发需求。
- 清晰的文档: 拥有完善的官方文档,方便开发者学习和使用。
- 易于使用: 基于 Vue 2.0 开发,易于上手,可以快速集成到 Vue 项目中。
- 主题定制: 支持主题定制,可以根据项目需求调整样式。
二、安装 Element UI
在已有的 Vue 2 项目中,可以通过 npm 或 yarn 安装 Element UI:
# 使用 npm
npm i element-ui -S

安装成功如上图。
在vue项目中使用elementui组件库
在项目目录中的src文件夹中打开main.js,添加以下几行代码:
// 导入 Element UI 和全部的样式
import ElementUI from 'element-ui'
import 'element-ui/lib/theme-chalk/index.css'

// 使用 Element UI
Vue.use(ElementUI)
修改后的main.js完整内容如下:
import Vue from 'vue'
import App from './App.vue'

// 导入 Element UI 和全部的样式
import ElementUI from 'element-ui'
import 'element-ui/lib/theme-chalk/index.css'

// 使用 Element UI
Vue.use(ElementUI)

Vue.config.productionTip = false

// 将App组件挂载到div上,显示在页面上
new Vue({
  render: h => h(App),
}).$mount('#app')
保存,打开App.vue文件,在template标签中添加以下代码:
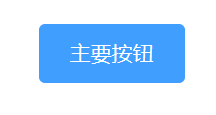
<el-button type="primary">主要按钮</el-button>
使用npm run serve运行vue项目,在页面上出现一个蓝色的按钮

说明elementUI安装并使用成功!
三、控件介绍
Element UI 提供了大量的组件,这里介绍几个常用的组件:
- el-button (按钮): 用于触发操作,支持多种类型、大小和样式。
- el-input (输入框): 用于接收用户输入,支持多种类型,例如文本、密码、数字等。
- el-form (表单): 用于收集用户输入的数据,可以进行表单验证。
- el-table (表格): 用于展示数据列表,支持排序、筛选、分页等功能。
- el-row 和 el-col (布局): 基于栅格布局系统,用于页面布局。
更多组件及详细用法请参考 Element UI 官方文档:https://element.eleme.cn/#/zh-CN/component/installation
四、使用 Element UI 搭建一个简单的计数器页面
我们将搭建一个简单的计数器页面,包含加、减、重置三个按钮。
<template>
  <div class="counter">
    <h1>{{ count }}</h1>
    <div>
      <el-button @click="increment">+</el-button>
      <el-button @click="decrement">-</el-button>
      <el-button @click="reset">Reset</el-button>
    </div>
  </div>
</template>

<script>
export default {
  data() {
    return {
      count: 0
    };
  },
  methods: {
    increment() {
      this.count++;
    },
    decrement() {
      this.count--;
    },
    reset() {
      this.count = 0;
    }
  }
};
</script>

<style scoped>
.counter {
  display: flex;
  flex-direction: column;
  align-items: center;
  justify-content: center;
  height: 100vh; /* 使计数器垂直居中 */
}

h1 {
  font-size: 3rem;
  margin-bottom: 20px;
}

.el-button {
  margin: 0 5px;
}
</style>
代码解释:
-
template 部分:-
<h1> 标签显示计数器的值count。 - 三个
el-button 分别用于增加、减少和重置计数器的值。@click 指令绑定了对应的点击事件处理方法。
-
-
script 部分:-
data() 返回一个对象,包含计数器的初始值count: 0。 -
methods 对象定义了三个方法:-
increment():将count 加 1。 -
decrement():将count 减 1。 -
reset():将count 重置为 0。
-
-
-
style 部分:-
scoped 属性确保样式只作用于当前组件。 - 使用
flex 布局使计数器在页面中垂直和水平居中。 - 设置
h1 的字体大小和底部边距。 - 设置按钮之间的间距。
-
使用方法:
- 确保你的 Vue 项目中已经安装了 Element UI。如果没有安装,请参考之前的安装步骤。
- 创建一个新的 Vue 组件文件,例如
Counter.vue。 - 将上面的代码复制到
Counter.vue 文件中。 - 在你的主应用组件或其他组件中引入并使用
Counter 组件:
<template>
  <div>
    <Counter />
  </div>
</template>

<script>
import Counter from './Counter.vue';

export default {
  components: {
    Counter
  }
};
</script>
现在,你应该能够在页面上看到一个计数器,并使用按钮控制它的值。
